博客 AI 摘要及优化
- 4 分钟阅读
- CC BY-SA 4.0

博客 AI 摘要及优化
为何需要 AI 摘要
记不太清了,印象中在中学时代学过一篇课文,是讲如何读报纸的。
我在阅读时一直保持了当时文中介绍的习惯。
对于不需要精读的内容可以跳读。
现在 ChatGPT 爆火后出现了大量的应用,其中 AI 摘要插件对我的帮忙很大。
信息过剩后,我们被很多低价值的信息轰炸,这类插件可以让我快速的辨别一篇文章是否值得细读。
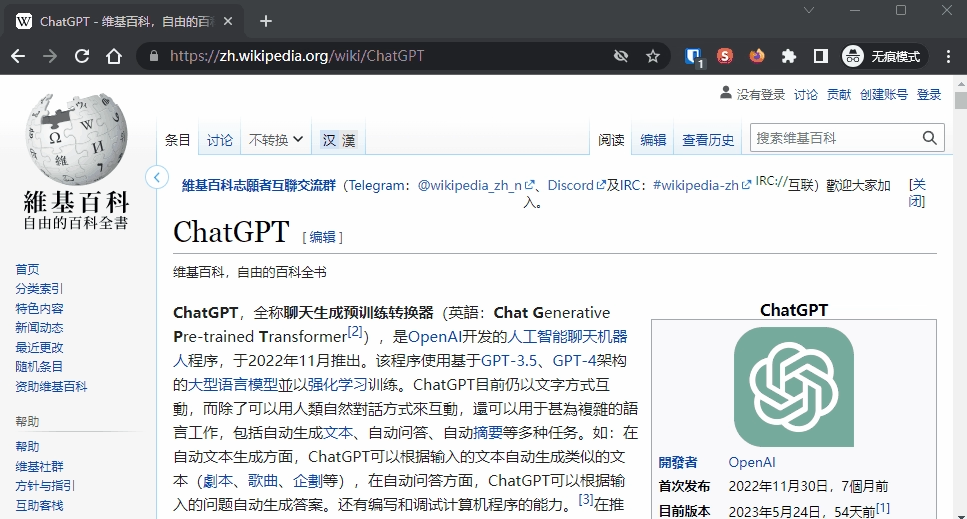
通过多方对比后,我选择了「
ChatGPT 总结助手 - Chrome 应用商店」作为我浏览网页时的首选插件。
它的使用效果如图:
必须要 AI 摘要吗
不必要!
我集成 AI 摘要只是为了方便跟我有一样阅读习惯的人。
我的个人博客在于记录生活和写一些备忘录,对于别人来说全是一些低价值的数据。
我现在在博客上集成了 AI 摘要功能,是因为我使用了
TianliGPT。
我当时因为出于“支持独立开发者”的情结,购买了 TianliGPT 的服务。
发现购买的 Key 很快就消耗完了,又买了一个 Key,发现还是不够,再买了一个 Key。
即便如此,我的博客中也只有不到三分之二的文章有 AI 摘要。
这样下去,感觉像个无底洞。
这个时候的 AI 摘要功能就变成了一个历史包袱。
如果取消 AI 摘要功能,那前面花的那些小钱就变成了沉没成本了。
有情怀不代表需要妥协 Geek 精神。
所以决定自己动手改造一下 AI 摘要。
这也符合当初换到 Hugo 静态博客的初衷,尽量把数据都静态化。
尽量让页面数据 SSG(Static-Site Generation)/ SSR(Server-Side Rendering)。
怎么优化 AI 摘要
推荐:https://github.com/Moraxyc/ai-summary-hugo 辅助生成 summary.json 的 Python 脚本
1. 方式
把 AI 摘要放在本地有 2 个思路:
- 在
data目录下用.json文件保存数据
- 把摘要结果放在文章
.md文件的 Front Matter 里
2. 数据格式
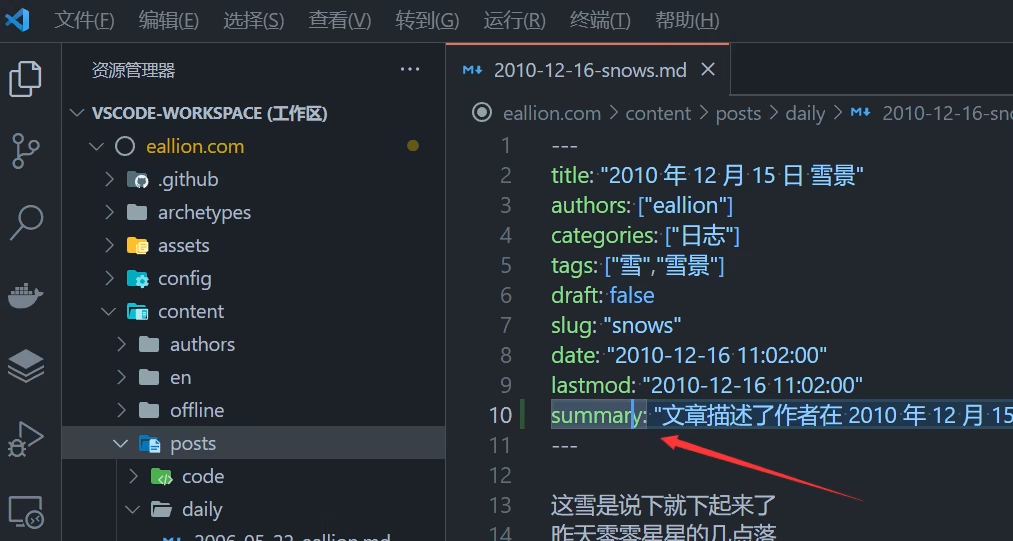
我选择的是方式 1,把所有 AI 摘要放在 ,这样方便后期维护,也不破坏现有文章。.json 文件中
Update:我现在选择的是方式 2,把 AI 摘要放在文章的 Front Matter 里。
数据来源:
- TianliGPT 已经生成的摘要
- 通过脚本从 ChatGPT 和 Claude2 获取的摘要
我现在用了好几个脚本来获取摘要,没有一个完美的脚本能胜任这一工作,所以就不贴脚本了。
TianliGPT 的摘要,可以在网页上按 F12 打开 DevTools 找到:

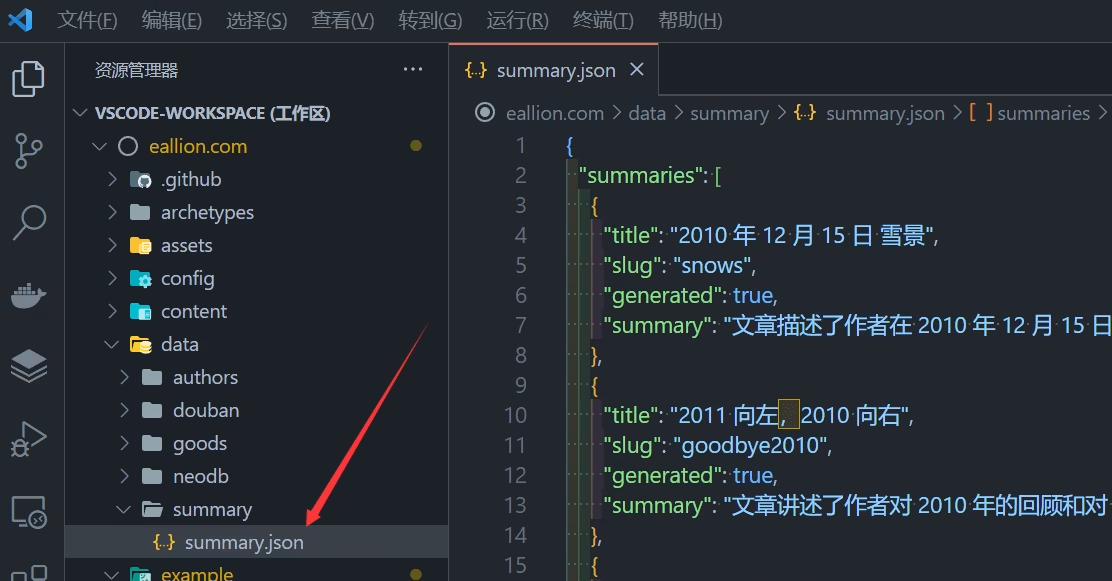
把多种方式获取到的 AI 摘要集中起来后,生成一个 summary.json 文件。
在 data 目录新建
data/summary/summary.json 文件,所有数据复制到其中,数据格式:
{
  "summaries": [
    {
      "title": "2010 年 12 月 15 日 雪景",
      "slug": "snows",
      "generated": true,
      "summary": "文章描述了作者在 2010 年 12 月 15 日所经历的雪景。作者提到,下雪之前天空只有几点零星的白天,没人预料到会下这么大的雪。作者认为家乡可能下得更大。文章还提到了关于地址设定和程序错误的问题,并以数字花园用爱发电作为结尾。"
    },
    {
      "title": "2011 向左,2010 向右",
      "slug": "goodbye2010",
      "generated": true,
      "summary": "文章讲述了作者对 2010 年的回顾和对 2011 年的期望。他认为自己在过去一年中太过于为别人而活,失去了自我。他希望新的一年能更加积极阳光,并将经历和感悟当成财富。最后,他表示不再傻逼地诉说苦难,祝大家新年快乐。"
    }
    ]
}
其中 generated 是我自用的一个判断词,可有可无,title 和 slug 是用于对应文章的锚点。
3. 渲染 AI 摘要
把 summary.json 文件中的 AI 摘要渲染到每篇文章的开头,修改一下 Hugo 文章的模板文件即可。
不同主题的模板文件可能不太一样,不过也差不离。
一般名叫 single.html,位于主题的 layouts 或 Hugo 根目录的 layouts 下。
比如 DoIt 的模板位于 themes/DoIt/layouts/posts/single.html。
我把它复制到根目录
layouts/posts/single.html 了,
同名模板优先渲染根目录。
在文章模板 single.html 的 {{ .Content }} 之前,插入以下代码:
<!-- 其他代码 -->

{{ $data := dict }}
{{ $path := "data/summary/summary.json" }}

{{ with resources.Get $path }}
  {{ with . | transform.Unmarshal }}
    {{ $data = . }}
  {{ end }}
{{ else }}
  {{ errorf "Unable to get global resource %q" $path }}
{{ end }}

{{ $currentSlug := .Params.slug }}

{{- if $data.summaries }}
  {{ $matchingSummary := index (where $data.summaries "slug" $currentSlug) 0 }}

  {{- if $matchingSummary }}
    <!-- 渲染 AI 摘要部分 -->
    <div class="post-ai">
        <div class="ai-title">
            <i class="fas fa-robot ai-title-icon"></i>
            <div class="ai-title-text">AI 摘要</div>
        </div>

        <div class="ai-explanation ai-explanation-content">
            {{ if $matchingSummary.summary }}
                {{ $matchingSummary.summary }}
            {{ else }}
                AI 摘要接口暂时失联……
            {{ end }}
        </div>
    </div>
  {{- else }}
    <p>未找到相关内容。</p>
  {{- end }}
{{- else }}
  <p>无法加载总结数据。</p>
{{- end }}

<!-- 渲染文档正文 -->
{{ .Content }}

<!-- 其他代码 -->
不需要打字机效果,上面的内容已经可用了。
如果需要打字机效果,需要取消 <div id="ai-explanation" class="ai-explanation"></div> 的注释。
需要给 <div class="ai-explanation-content" style="display: none;"> 添加 display: none 隐藏掉,它的作用仅给 Typeit 插件赋值。
添加 JS:
<script src="https://unpkg.com/typeit@8.7.1/dist/index.umd.js"></script>

<script>
document.addEventListener("DOMContentLoaded", function () {
    // 从 .ai-explanation-content 取值
    const matchingSummary = document.querySelector(".ai-explanation-content").textContent;

    new TypeIt("#ai-explanation", {
        strings: matchingSummary,
        speed: 50,
        lifeLike: true,
        waitUntilVisible: true,
    }).go();
});
</script>
4. 简单的 CSS
.post-ai {
    background: #f5f5f5;
    border-radius: 0.5rem;
    padding: 0.5rem;
    line-height: 1.3;
    border: 1px solid #cfe6f3;
    margin: 1rem 0;
}

.ai-title {
    display: flex;
    color: #2d96bd;
    border-radius: 0.5rem;
    align-items: center;
    padding: 0 0.25rem;
    cursor: default;
    user-select: none;
}

.ai-title-icon {
    width: 20px;
    height: auto;
    margin-right: 0.25rem;
}

.ai-title-text {
    font-weight: bold;
    margin-left: 0.25rem;
    line-height: 1;
}

.ai-explanation {
    margin-top: 1rem;
    padding: 0.5rem 1rem;
    background: #fff;
    border-radius: 0.5rem;
    border: 1px solid #cfe6f3;
    font-size: 0.95rem;
    line-height: 1.4;
    display: inline-block;
    width: 100%;
}

.ai-explanation span {
    margin-left: 0.5rem;
}

/* .ai-explanation-content {
    display: none !important;
} */